First check the reports of the closings before checking individual postings. The Overview at closing date in particular helps you to obtain an overview of all the balances and thus the overall situation of the project. It is also advisable to take a look at the Average rate development report at the beginning. If there are unusual average rate deviations, this report will help you to spot them more quickly than in the posting overview.
Then start checking the postings. If you find any errors, follow the Correcting postings guide.
NOTE: To view postings, you need one of the following user roles: ▪Project finance manager ▪Project accountant ▪Project controller ▪Project financial auditor To upload or update digital vouchers, you need the Digital vouchers editor user role. To mark digital vouchers as checked, you need the Digital vouchers auditor user role. |
Examples
Use the table settings to check the content of the postings of a month-end closing. Your organisation decides what you should check exactly and what requirements are to be met so that a closing can be marked as Verified. The following examples illustrate how you can systematically control accounting data. If you regularly check certain posting data, save your table settings in user-defined views to save time.
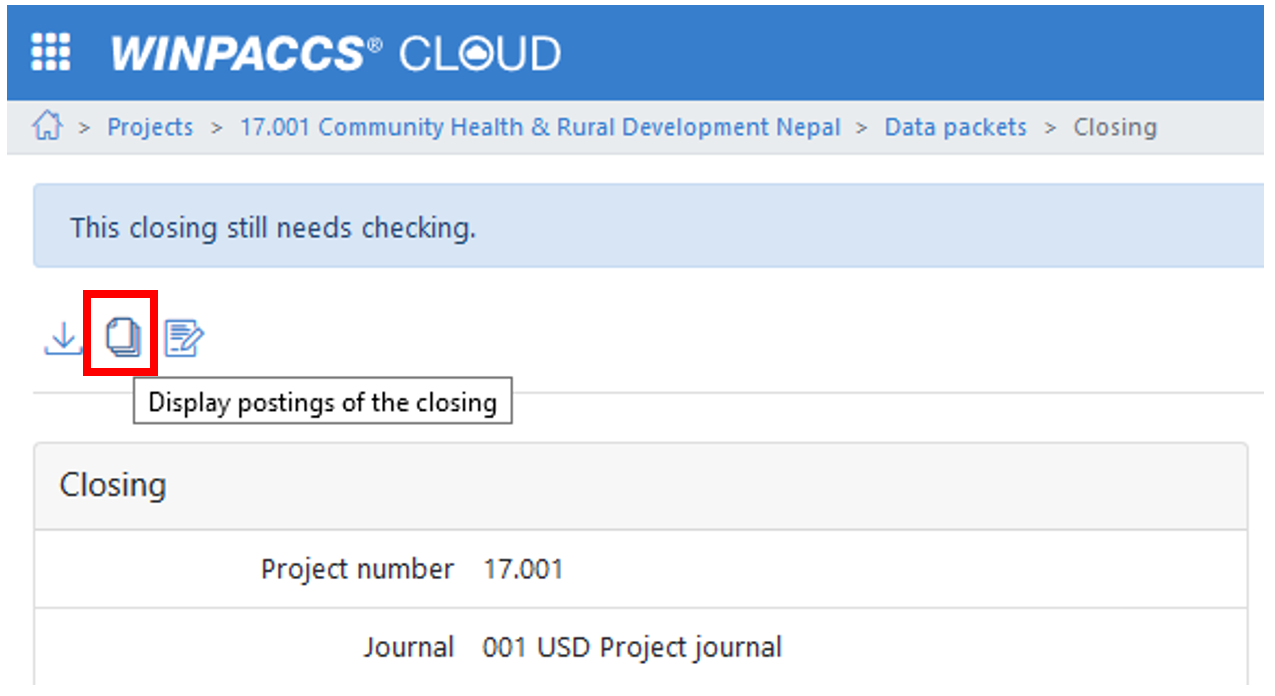
To view all the postings uploaded with a specific closing, proceed as follows: 1.At 2.Click there on Display postings of the closing (
|
To display all the postings posted in a particular accounting period, proceed as follows: 1.Open 2.Filter the Project, Journal and Accounting period columns. 3.Sort the voucher number column to display the vouchers chronologically. 4.Remove the columnsthat you do not need. 5.Save the view to be able to reuse it later. 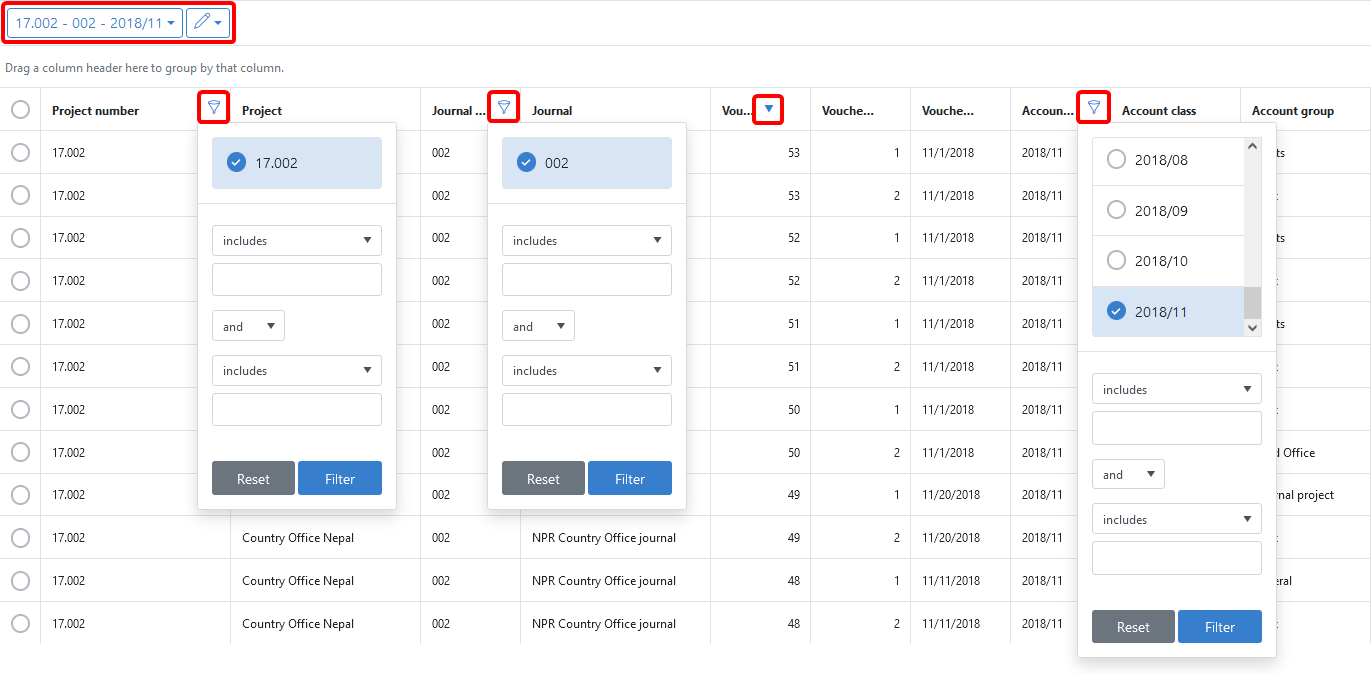 |
If you find or suspect that there are discrepancies in the Average rate development report, check that all the vouchers have been posted in the correct order. If the average rate does not appear plausible, it may be that a average rate-changing transaction was posted too early or too late. Since a average rate changing posting affects the average rate of all the following postings, it is important that the vouchers are entered in the order in which the payments are made. To check the order of the vouchers, proceed as follows: 1.Filter all the postings of the relevant period or open the View described above. 2.Show the Average rate posting column. 3.Sort the postings according to the voucher date in order to identify voucher numbers that do not fit the order. The voucher date indicates when a payment was made. The voucher number shows the order in which the vouchers were posted. In the following example, vouchers 48 and 49 were posted too early. Note that the order of postings with the same voucher date must also be correct. The supply of funds on 1 November (voucher 50) influences the average rate of acquisitions on the same day. Their acquisition amount in company currency is only correct if they were posted in the same order as the payments. 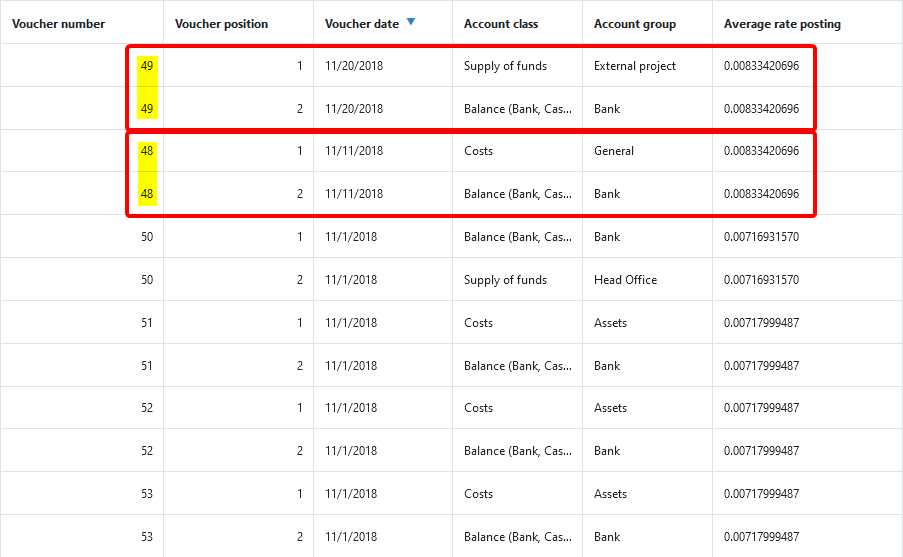 In addition, there may be other causes for an incorrect average rate; for example, an incorrect exchange rate may have been used in a average rate changing posting. |
If you want to check which postings have been reposted or reversed, proceed as follows: 1.Filter all the postings of the relevant period or open the View described above. 2.Shows the Reposting and Reposted posting position or Reverse posting position and Reversed posting position. 3.Group by Reposting and Reposted posting position or Reverse posting position and Reversed posting position. A reference to the original posting is included in the posting text of repostings, reversals and correction postings. 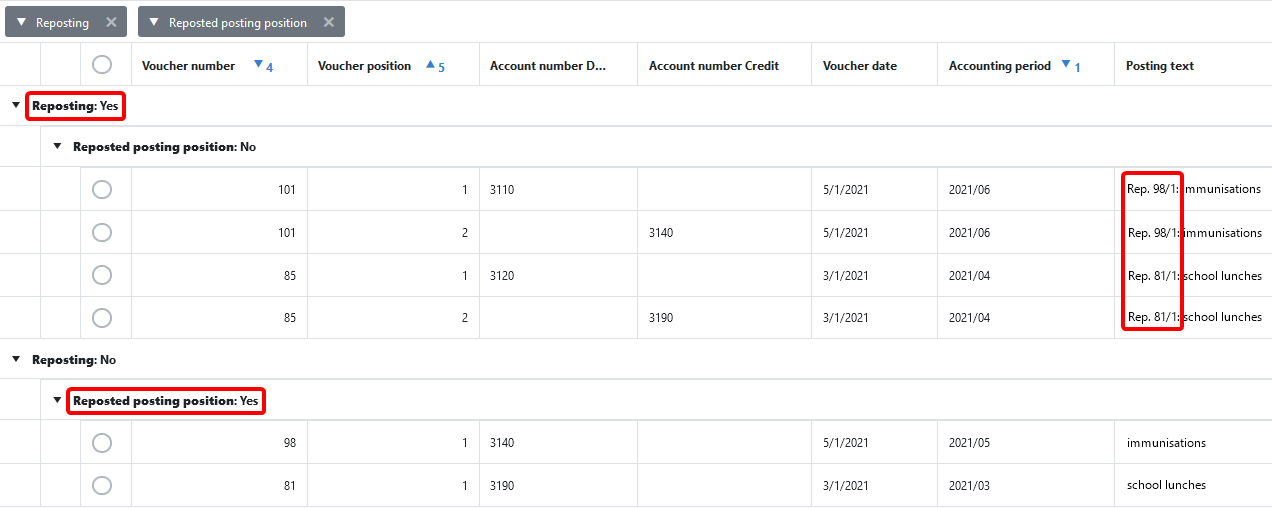 |
If you want to view individual postings and (if available) digital vouchers, proceed as follows: 1.Open a posting position with a double click or select a posting position and click on Display ( 2.Click on Digital vouchers ( 3.Use the forward and back buttons to move to the next posting position. The posting positions are displayed in the order in which they are shown in the filtered posting overview. 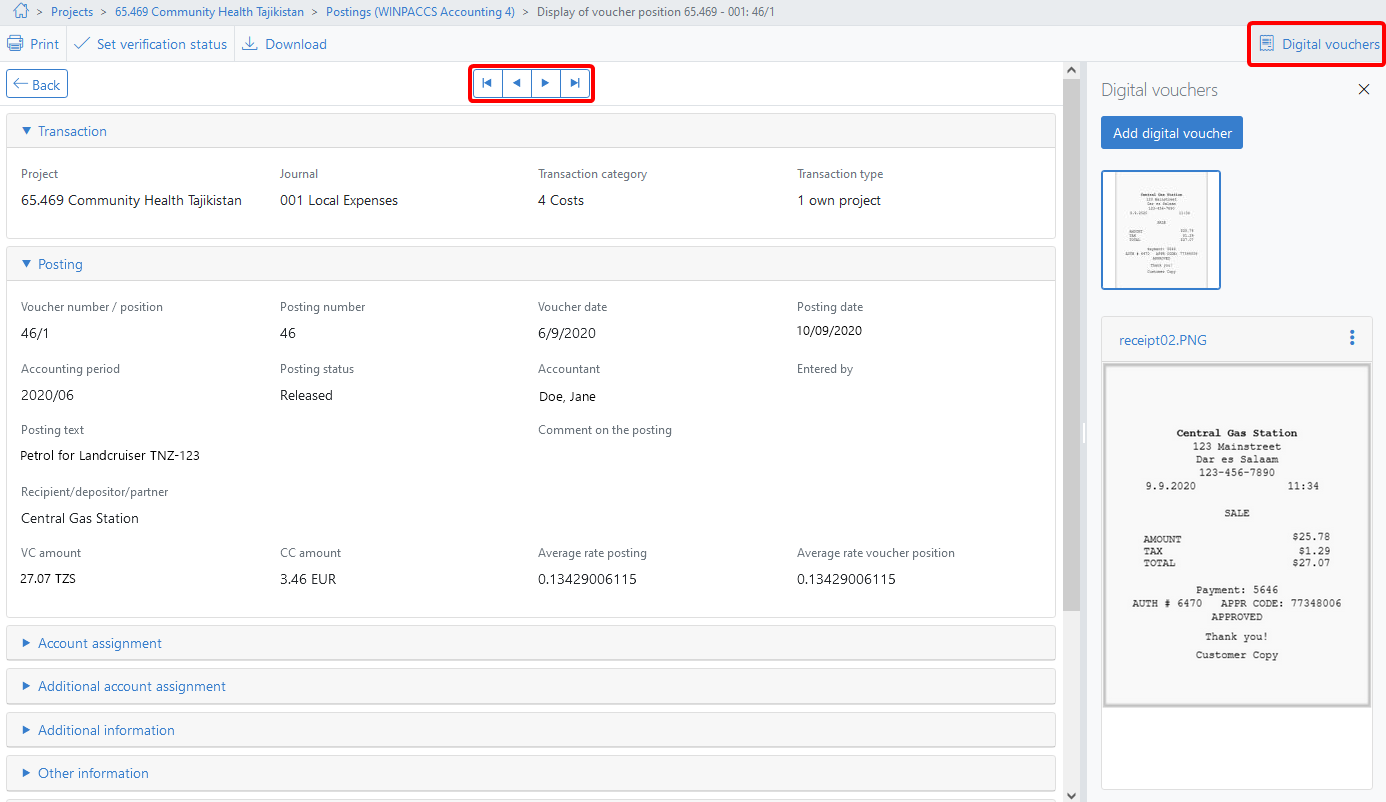 |
Users with the Digital vouchers editor user role can mark uploaded digital vouchers as checked. If you want to systematically check all unchecked digital vouchers, proceed as follows: 1.Filter all the postings of the relevant period or open the View described above. 2.Shows the Digital vouchers status column. 3.Group by Digital vouchers status or filter the column by the available status. All postings with the same status are displayed together.  4.Use a double click to open the first posting position with the Available status. The posting position opens. 5.Click on Digital vouchers ( 6.Check the digital voucher according to your organisation's requirements. As a minimum, you should check: a.Is the voucher legible? b.Does the voucher belong to this posting? c.Has the voucher data been transferred correctly? For example, do the voucher date, amount and posting text of the posting match the voucher? d.If there is an account assignment stamp on the voucher: Does the account assignment of the posting match the information on the voucher? 7.To mark all the digital vouchers of the opened posting as Verified, click on Set verification status ( 8.Switch via the forward and back buttons to the next unchecked posting position until all the digital vouchers have been checked  If you find that a voucher is missing or needs to be replaced, a user with the Digital vouchers editor user role can upload a (new) voucher. Once uploaded, you can only replace vouchers with a new version; you cannot delete them. Vouchers with the Checked?? status can be put back into the Available status with the Reset verification status (  |
|
